|
The
most difficult construction task for this project was
the aviary front. The front is the finished panel that
you will see when you look at the aviary from the outside.
The doors are hinged to this piece.
The
front was built from select pieces of 1" thick red-oak,
purchased from a local lumber company. The pieces were
cut to size based on the design I had created earlier
(some alterations to the design were made, allowing for
a taller baseboard and top board).
Because
this piece would be the most highly visible, it needed
to be pieced together seamlessly, without screws, nails
or other hardware being visible. To connect the boards
without the use of such hardware, Tom drilled holes into
each board where they would meet and fastened them together
by inserting dowel rods and wood glue. In order for this
approach to work, the holes would have to be drilled straight,
or the dowel rods will not insert properly. A nifty little
tool called a Dowel Jig can ensure the holes are drilled
correctly, by clamping to the board and guiding the drill.
See the diagrams below for an illustrated step-by-step
guide (remember, click on any image to view an enlargement):
|
|
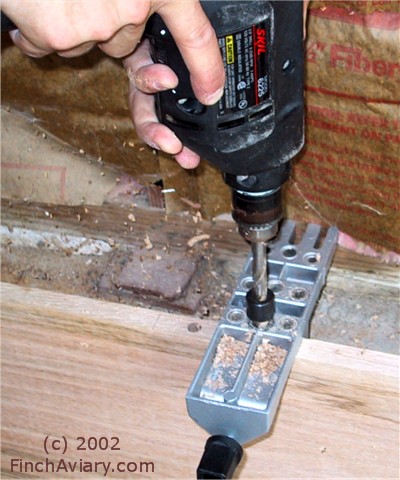
1.
First, holes were drilled where two boards would be
joined. A Dowel Jig ensured the holes were drilled
straight. |
|
|
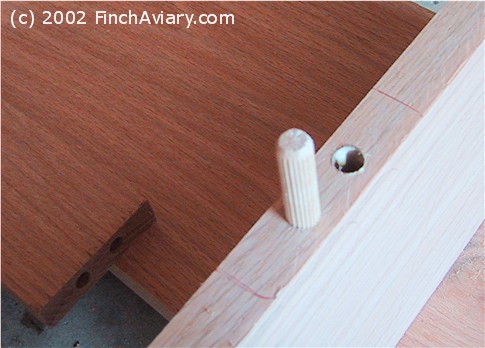
2.
Next, wood glue was inserted into the holes and placed
on the ends of the dowels. Then, the dowels were inserted
into the holes and hammered into place. |
|
|
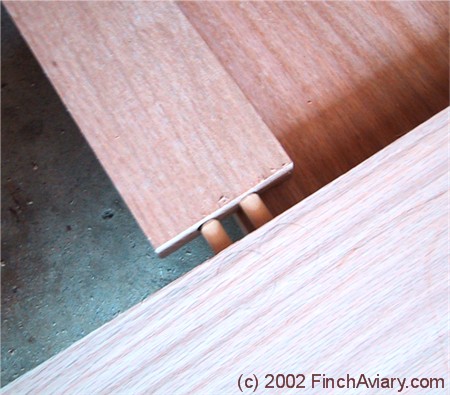
3.
Finally, the dowels were aligned with the holes in
the adjoining piece and the adjoining piece was hammered
in until the boards met. |
|
|
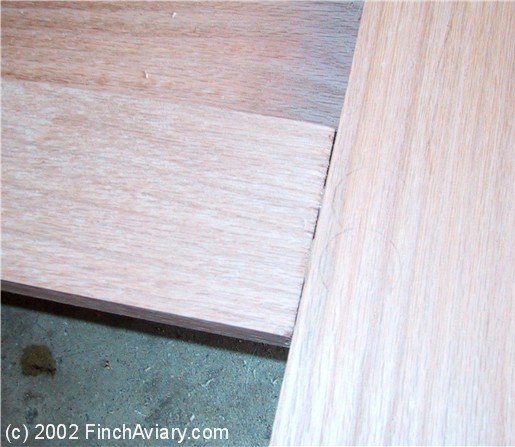
4.
The finished seam. |
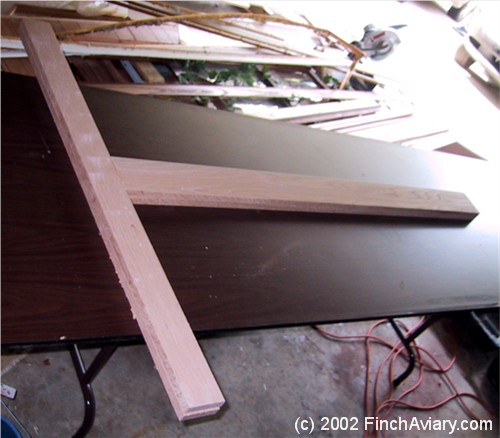
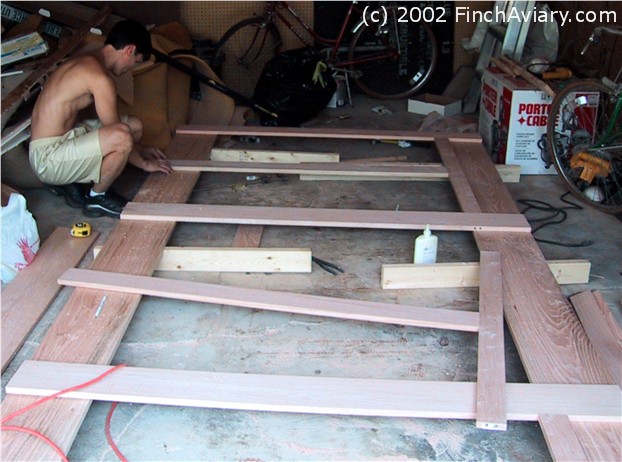
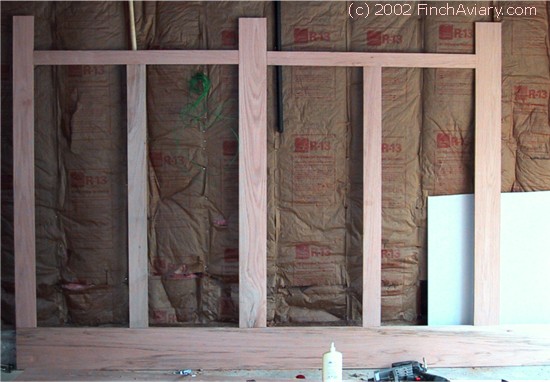
The
front was built mostly in our garage. To begin, Tom created
three pieces in the shape of a "T". These pieces
would be used in the place where the doors would meet
in each third of the aviary. Next, he began connecting
pieces to the baseboard, making sure the boards were spaced
the correct distance apart. This became tricky, because
each piece needed to be connected via dowel rods to both
the piece next to it and the baseboard below it. Careful
alignment was crucial here. See the step-by-step guide
below for details:
|
|
1.
First, three T-shaped beams were created. |
|
|
2.
Next, all pieces were layed out in the garage so that
the appropriate positioning could be gaged. |
|
|
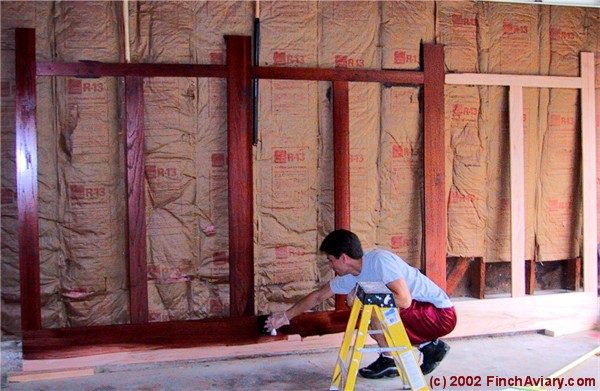
3.
Then the pieces were joined together using the joining
method described above. |
|
|
4.
It was a little tricky to get both the dowels connecting
the piece to the bottom and the dowels connecting
the piece to its neighbor to align properly. |
|
|
5.
However, with patience, it could be done. |
|
|
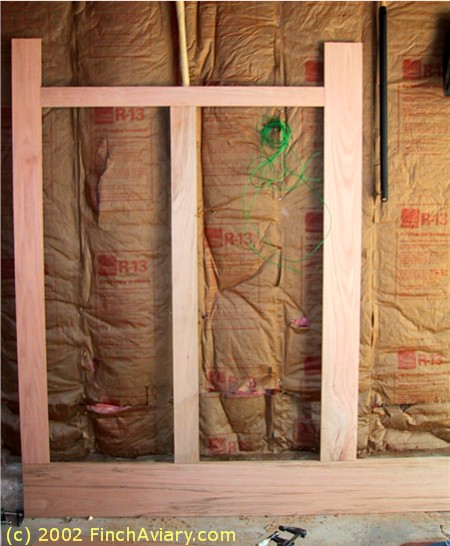
6.
The top piece of wood could not be attached at this
time or the structure would not fit in through our
door. |
Next,
the front was stained (we used Minwax Red Oak to match
our living room banister and moldings) and when the stain
was dry, it was coated with a Polyurethane finish. Once
the finish had dried, it was ready to be installed.
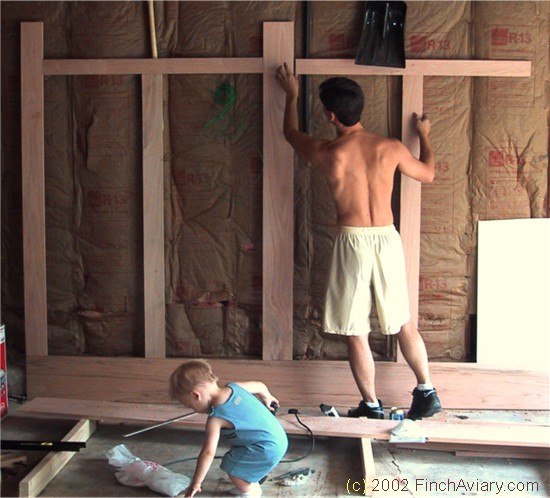
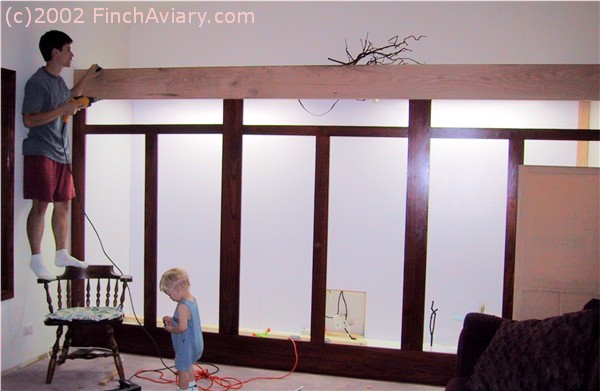
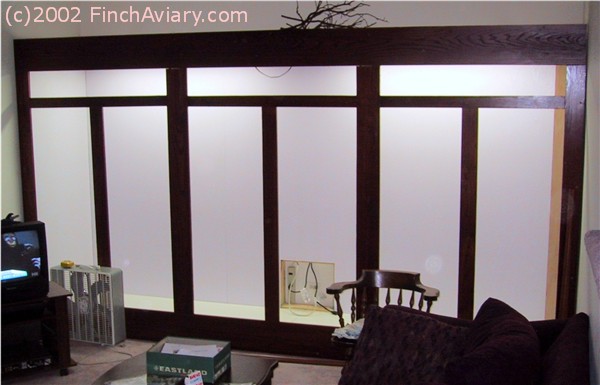
It
took three of us (Tom, me, and my brother) to get the
front (very heavy front) through the door and aligned
with the aviary frame. Once we had it where we wanted
it, Tom aligned the top piece (unfortunately, the top
piece was not yet stained due to timing issues) and hammered
it down into place. The entire front was then screwed
into place along all four sides (top, bottom, left, and
right). Tom drilled shallow holes slightly larger than
the head of the screws so that the screw head would be
flush with the aviary front. This was done so that the
screw heads would not stick out and interfere with trim
that would later be installed over them.
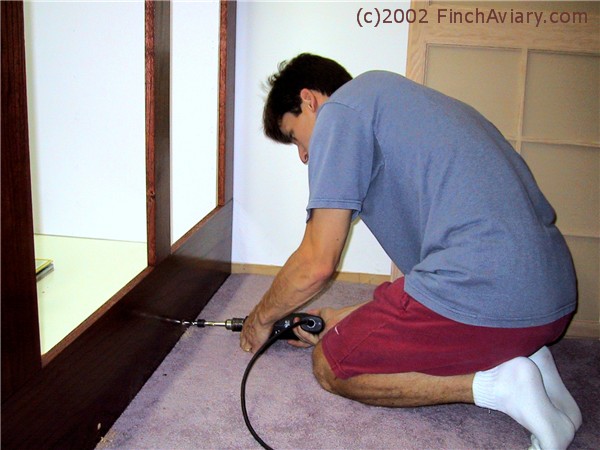
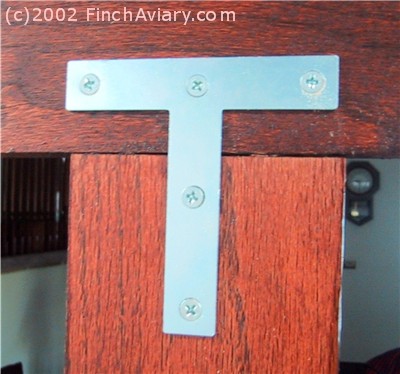
To
reinforce some of the joints, Tom installed T-plates on
the inside. Finally, the top piece was stained and finished,
and the front was done, except for the trim, which would
be added at a later time. See the step-by-step guide below.
|
|
1.
Tom stains the front with MinWax Red Oak and later
adds a Polyurethane finish.
|
|
|
2.
After the front is in position, Tom attaches the top
board. |
|
|
3.
Tom attaches the front to the frame with screws all
around the top, bottom and both sides. |
|
|
4.
Some joints are reinforced with T-plates. |
|
|
5.
Finally,
the top board is stained and finished. It's starting
to look like an aviary. |
|